How to Host a Website on NAT VPS Using Cloudflare and Nginx on Ubuntu
Hosting your website on a web hosting service running cPanel is fun. But how if you need more resource like running cron or mail server? Rent a dedicated server or co-location seems to be the answer some years ago. Now, as the virtualization technology getting more advanced, we could pay about the price of a nice meal to get a VPS.
If you want to go cheaper, there's a solution called NAT VPS. It's just like a common VPS but usually without having dedicated IPv4 (A single public IPv4 is available, but shared with other users). Although we're sharing IPv4, each VPS has some dedicated IPv6. The price is just unbelievable, starts from $2 per year!
But how could we host a website without IPv4? Thanks to Cloudflare, we can host a website by using IPv6 from our NAT VPS provider.
Cloud what?
Cloudflare is a service that sits between your visitor and your VPS, acting as a reverse proxy for your website. Cloudflare provides a Content Delivery Network (CDN), as well as DDoS mitigation and distributed domain name server services.
Prerequisites
- NAT VPS with Nginx installed
- Cloudflare account
- A domain name
Generate Origin CA TLS Certificate from Cloudflare
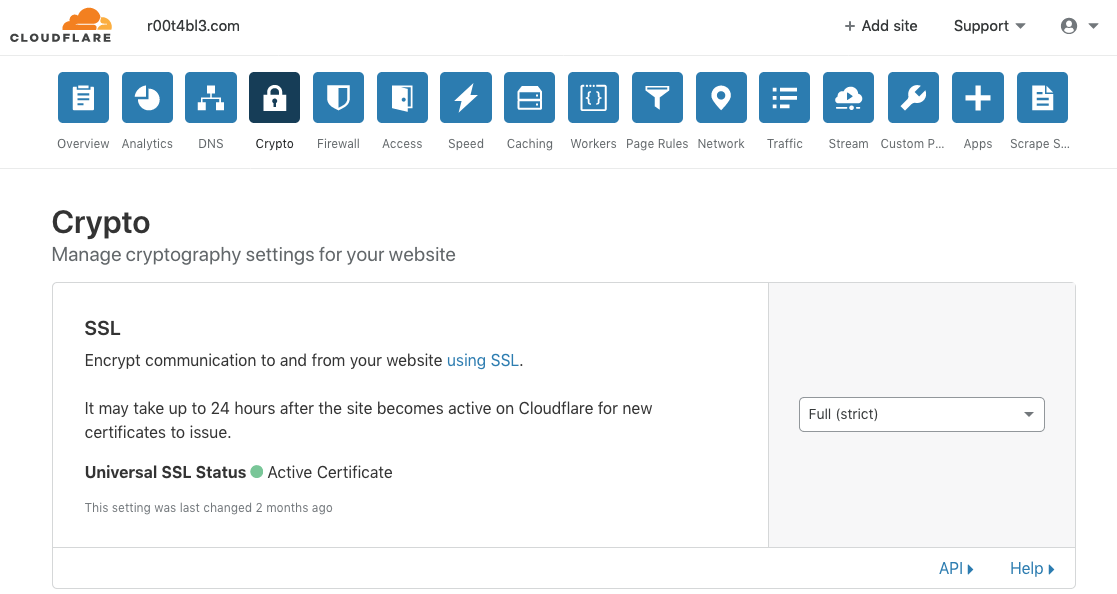
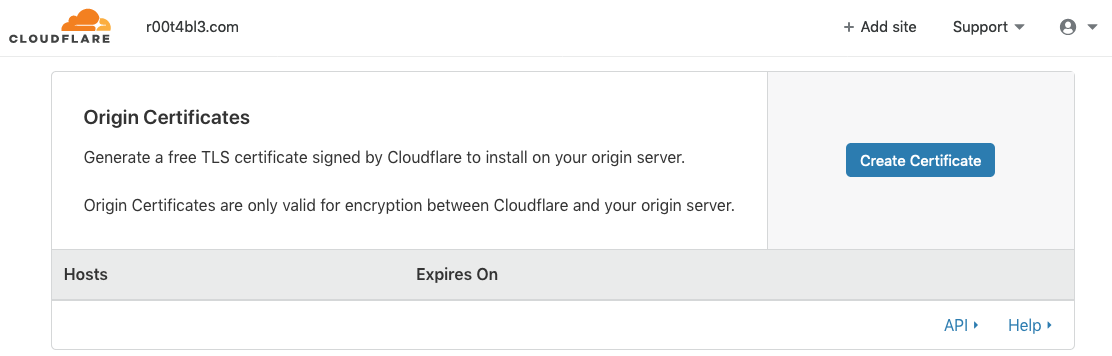
First step is generate origin CA TLS certificate from Cloudflare. To do this, log in to your Cloudflare dashboard. Go to Crypto > Origin Certificates > Create Certificate.

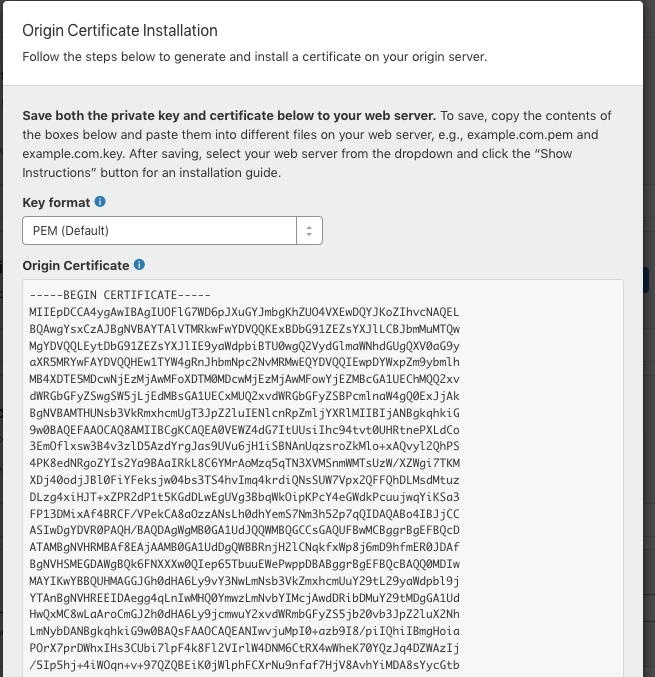
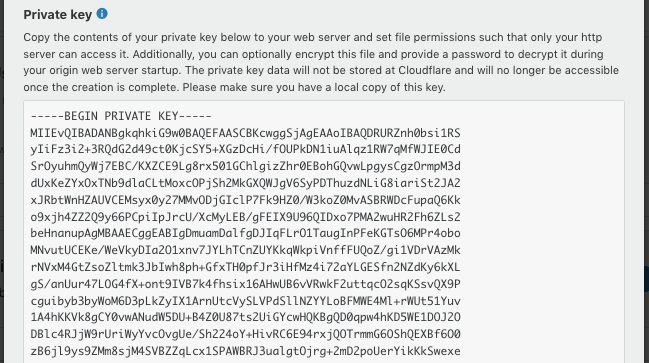
Now it's time to put both files cert.pem and key.pem to correct place. The certificate cert.pem goes to /etc/ssl/certs/cert.pem and the key key.pem goes to /etc/ssl/private/key.pem.
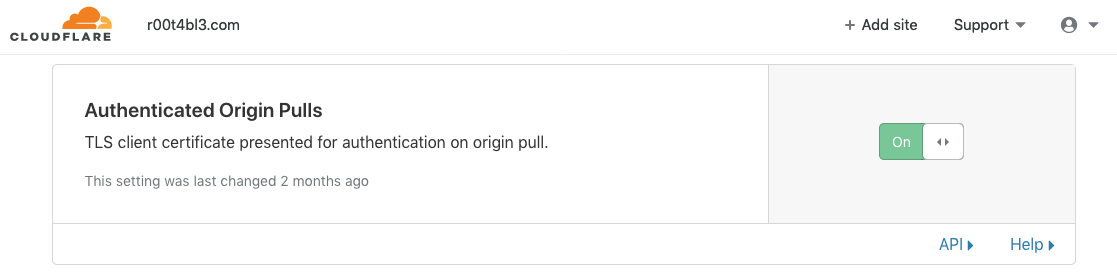
We're almost finished. The Origin CA certificate will help Cloudflare verify that it is talking to the correct origin server. But how can your origin Nginx server verify that it is actually talking to Cloudflare? That's what TLS Client Authentication for.
In a client authenticated TLS handshake, both sides provide a certificate to be verified. The origin server is configured to only accept requests that use a valid client certificate from Cloudflare. Requests which have not passed through Cloudflare will be dropped as they will not have Cloudflare's certificate. This means that attackers cannot circumvent Cloudflare's security measures and directly connect to your Nginx server.
Cloudflare presents certificates signed by a CA with the following certificate below:
-----BEGIN CERTIFICATE-----
MIIGBjCCA/CgAwIBAgIIV5G6lVbCLmEwCwYJKoZIhvcNAQENMIGQMQswCQYDVQQG
EwJVUzEZMBcGA1UEChMQQ2xvdWRGbGFyZSwgSW5jLjEUMBIGA1UECxMLT3JpZ2lu
IFB1bGwxFjAUBgNVBAcTDVNhbiBGcmFuY2lzY28xEzARBgNVBAgTCkNhbGlmb3Ju
aWExIzAhBgNVBAMTGm9yaWdpbi1wdWxsLmNsb3VkZmxhcmUubmV0MB4XDTE1MDEx
MzAyNDc1M1oXDTIwMDExMjAyNTI1M1owgZAxCzAJBgNVBAYTAlVTMRkwFwYDVQQK
ExBDbG91ZEZsYXJlLCBJbmMuMRQwEgYDVQQLEwtPcmlnaW4gUHVsbDEWMBQGA1UE
BxMNU2FuIEZyYW5jaXNjbzETMBEGA1UECBMKQ2FsaWZvcm5pYTEjMCEGA1UEAxMa
b3JpZ2luLXB1bGwuY2xvdWRmbGFyZS5uZXQwggIiMA0GCSqGSIb3DQEBAQUAA4IC
DwAwggIKAoICAQDdsts6I2H5dGyn4adACQRXlfo0KmwsN7B5rxD8C5qgy6spyONr
WV0ecvdeGQfWa8Gy/yuTuOnsXfy7oyZ1dm93c3Mea7YkM7KNMc5Y6m520E9tHooc
f1qxeDpGSsnWc7HWibFgD7qZQx+T+yfNqt63vPI0HYBOYao6hWd3JQhu5caAcIS2
ms5tzSSZVH83ZPe6Lkb5xRgLl3eXEFcfI2DjnlOtLFqpjHuEB3Tr6agfdWyaGEEi
lRY1IB3k6TfLTaSiX2/SyJ96bp92wvTSjR7USjDV9ypf7AD6u6vwJZ3bwNisNw5L
ptph0FBnc1R6nDoHmvQRoyytoe0rl/d801i9Nru/fXa+l5K2nf1koR3IX440Z2i9
+Z4iVA69NmCbT4MVjm7K3zlOtwfI7i1KYVv+ATo4ycgBuZfY9f/2lBhIv7BHuZal
b9D+/EK8aMUfjDF4icEGm+RQfExv2nOpkR4BfQppF/dLmkYfjgtO1403X0ihkT6T
PYQdmYS6Jf53/KpqC3aA+R7zg2birtvprinlR14MNvwOsDOzsK4p8WYsgZOR4Qr2
gAx+z2aVOs/87+TVOR0r14irQsxbg7uP2X4t+EXx13glHxwG+CnzUVycDLMVGvuG
aUgF9hukZxlOZnrl6VOf1fg0Caf3uvV8smOkVw6DMsGhBZSJVwao0UQNqQIDAQAB
o2YwZDAOBgNVHQ8BAf8EBAMCAAYwEgYDVR0TAQH/BAgwBgEB/wIBAjAdBgNVHQ4E
FgQUQ1lLK2mLgOERM2pXzVc42p59xeswHwYDVR0jBBgwFoAUQ1lLK2mLgOERM2pX
zVc42p59xeswCwYJKoZIhvcNAQENA4ICAQDKDQM1qPRVP/4Gltz0D6OU6xezFBKr
LWtDoA1qW2F7pkiYawCP9MrDPDJsHy7dx+xw3bBZxOsK5PA/T7p1dqpEl6i8F692
g//EuYOifLYw3ySPe3LRNhvPl/1f6Sn862VhPvLa8aQAAwR9e/CZvlY3fj+6G5ik
3it7fikmKUsVnugNOkjmwI3hZqXfJNc7AtHDFw0mEOV0dSeAPTo95N9cxBbm9PKv
qAEmTEXp2trQ/RjJ/AomJyfA1BQjsD0j++DI3a9/BbDwWmr1lJciKxiNKaa0BRLB
dKMrYQD+PkPNCgEuojT+paLKRrMyFUzHSG1doYm46NE9/WARTh3sFUp1B7HZSBqA
kHleoB/vQ/mDuW9C3/8Jk2uRUdZxR+LoNZItuOjU8oTy6zpN1+GgSj7bHjiy9rfA
F+ehdrz+IOh80WIiqs763PGoaYUyzxLvVowLWNoxVVoc9G+PqFKqD988XlipHVB6
Bz+1CD4D/bWrs3cC9+kk/jFmrrAymZlkFX8tDb5aXASSLJjUjcptci9SKqtI2h0J
wUGkD7+bQAr+7vr8/R+CBmNMe7csE8NeEX6lVMF7Dh0a1YKQa6hUN18bBuYgTMuT
QzMmZpRpIBB321ZBlcnlxiTJvWxvbCPHKHj20VwwAz7LONF59s84ZsOqfoBv8gKM
s0s5dsq5zpLeaw==
-----END CERTIFICATE-----
Copy text above and put it to /etc/ssl/certs/cloudflare.crt.
Update Nginx Configuration
Open your virtual host configuration on /etc/nginx/sites-available/. It should be something like this:
server {
    listen 80;
    server_name r00t4bl3.com www.r00t4bl3.com;
    return 301 https://$server_name$request_uri;
}

server {

    listen 443 ssl http2;
    ssl        on;
    ssl_certificate         /etc/ssl/certs/cert.pem;
    ssl_certificate_key     /etc/ssl/private/key.pem;
    ssl_client_certificate  /etc/ssl/certs/cloudflare.crt;
    ssl_verify_client on;

    server_name r00t4bl3.com www.r00t4bl3.com;

    root /var/www/r00t4bl3.com/html;
    index index.html index.htm index.nginx-debian.html;


    location / {
            try_files $uri $uri/ =404;
    }
}
Save the file and then restart nginx:
$ sudo systemctl restart nginx
Testing
Now it's time to open your web browser and test your website to verify that it was set up properly. If everything is correct, you should see your home page displayed.
Conclusion
I hope that you now know how to host a website on NAT VPS using Cloudflare and Nginx on Ubuntu. If you run into any issues or have any feedback feel free to drop a comment below.

Very helpful, thank your for the article