How to Use Tailwindcss with Laravel 7

Tailwind CSS is a highly customizable, low-level CSS framework that gives you all of the building blocks you need to build bespoke designs without any annoying opinionated styles you have to fight to override. Most CSS frameworks do too much. They come with all sorts of predesigned components like buttons, cards, and alerts that might help you move quickly at first, but cause more pain than they cure when it comes time to make your site stand out with a custom design.
Instead of opinionated predesigned components, Tailwind provides low-level utility classes that let you build completely custom designs without ever leaving your HTML. If you're sick of fighting the framework, overriding unwanted styles, and battling specificity wars, Tailwind was made for you.
In this post, I will share step-by-step instruction of how integrate Tailwind with Laravel. I assume you already familiar with Laravel framework and how to use it. If you not, you can read my previous post about Laravel 7 installation.
Download Tailwind
I'm using laravel-tailwind as an example directory name. Please change laravel-tailwind with your Laravel project directory name. Now go to this directory and start Tailwind installation. Open your terminal and enter these command:
$ cd laravel-tailwind
$ npm install tailwindcss
It will download tailwindcss and its dependencies. Please wait until download process completed. Note, to run the npm command make sure you have node installed on your machine. To check if it is installed go to your terminal and run comand node -v, If this gives you the version number of node installed on your machine, you are good to go. If not then first you have to install node. I've posted an article about node installation on Ubuntu Linux based machine.
Include Tailwind to Laravel CSS
When the tailwindcss download process completed, you should see a new folder named tailwindcss inside node_modules folder in your project. If not, then the tailwindcss download process could be failed. You can try to verify if you're running above command on your Laravel project or not. Otherwise, you can try to search it here.
Now we are ready to use tailwindcss in your project. By default Laravel project comes installed with Bootstrap as a default front-end framework. Since we are going to use tailwindcss we will remove the bootstrap imports and replace them with tailwindcss.
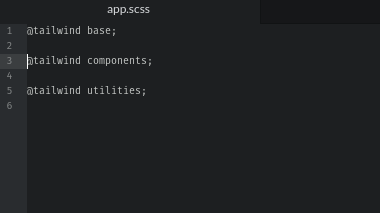
On your Laravel project directory, open this file: resources > sass > app.scss. You should see something like this:

Replace them with these new lines:
@tailwind base;
@tailwind components;
@tailwind utilities;
So your app.scss file will be like this:
Generate Tailwind Configuration File
If you'd like to customize your Tailwind installation, you need to generate a config file for your project using the Tailwind CLI utility. Back to your terminal, run this comand:
$ npx tailwind init
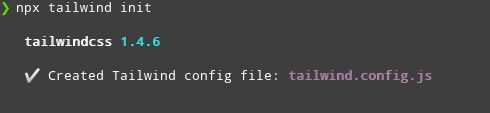
This command will generate a minimal tailwind.config.js file in your project root directory.

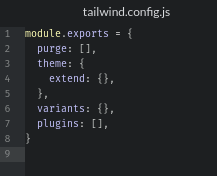
You can learn more about configuring Tailwind in the configuration documentation.
Include Tailwind in Laravel Mix
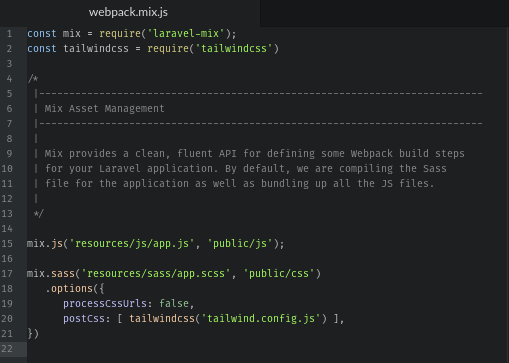
We need to tell Laravel Mix to compile tailwind sass using the Tailwind configuration file. Open the webpack.mix.js file and modify its default content.
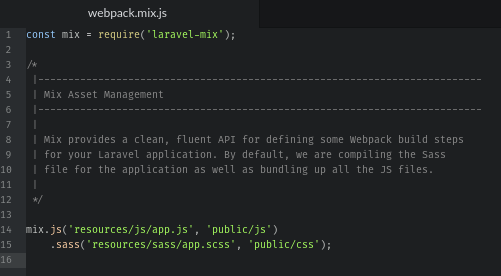
Modify its content with the code below:
const mix = require('laravel-mix');
const tailwindcss = require('tailwindcss')

/*
 |--------------------------------------------------------------------------
 | Mix Asset Management
 |--------------------------------------------------------------------------
 |
 | Mix provides a clean, fluent API for defining some Webpack build steps
 | for your Laravel application. By default, we are compiling the Sass
 | file for the application as well as bundling up all the JS files.
 |
 */

mix.js('resources/js/app.js', 'public/js');

mix.sass('resources/sass/app.scss', 'public/css')
   .options({
      processCssUrls: false,
      postCss: [ tailwindcss('tailwind.config.js') ],
})
Build Tailwind CSS
Finally we can build the tailwind css and use it with Laravel. Back to your terminal, enter this command:
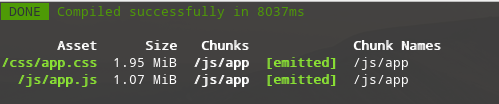
$ npm install && npm run dev
It will compile tailwind scss and generate compiled css and js file. In our particular case, it is public/css/app.css file.
Test Tailwind
Right now you should have successfully installed Tailwindcss into Laravel project. To verify it, let's change the file resources/views/welcome.blade.php
<!DOCTYPE html>
<html lang="en">
<head>
    <meta charset="UTF-8">
    <meta name="viewport" content="width=device-width, initial-scale=1.0">
    <title>Tailwind Login Template</title>
    <meta name="author" content="David Grzyb">
    <meta name="description" content="">

    <!-- Tailwind -->
    <link href="{{ asset('css/app.css') }}" rel="stylesheet">

</head>
<body class="bg-white h-screen">

    <div class="w-full flex flex-wrap">

        <!-- Login Section -->
        <div class="w-full md:w-1/2 flex flex-col">

            <div class="flex justify-center md:justify-start pt-12 md:pl-12 md:-mb-24">
                <a href="#" class="bg-black text-white font-bold text-xl p-4">Logo</a>
            </div>

            <div class="flex flex-col justify-center md:justify-start my-auto pt-8 md:pt-0 px-8 md:px-24 lg:px-32">
                <p class="text-center text-3xl">Welcome.</p>
                <form class="flex flex-col pt-3 md:pt-8" onsubmit="event.preventDefault();">
                    <div class="flex flex-col pt-4">
                        <label for="email" class="text-lg">Email</label>
                        <input type="email" id="email" placeholder="[email protected]" class="shadow appearance-none border rounded w-full py-2 px-3 text-gray-700 mt-1 leading-tight focus:outline-none focus:shadow-outline">
                    </div>

                    <div class="flex flex-col pt-4">
                        <label for="password" class="text-lg">Password</label>
                        <input type="password" id="password" placeholder="Password" class="shadow appearance-none border rounded w-full py-2 px-3 text-gray-700 mt-1 leading-tight focus:outline-none focus:shadow-outline">
                    </div>

                    <input type="submit" value="Log In" class="bg-black text-white font-bold text-lg hover:bg-gray-700 p-2 mt-8">
                </form>
                <div class="text-center pt-12 pb-12">
                    <p>Don't have an account? <a href="register.html" class="underline font-semibold">Register here.</a></p>
                </div>
            </div>

        </div>

        <!-- Image Section -->
        <div class="w-1/2 shadow-2xl">
            <img class="object-cover w-full h-screen hidden md:block" src="https://source.unsplash.com/IXUM4cJynP0">
        </div>
    </div>

</body>
</html>
When you open it in the web browser, you should see something similar:

Final Words
I hope that you now know how to install Use Tailwind with Laravel 7. If you run into any issues or have any feedback feel free to drop a comment below.