How to Automount A Drive or Partition at Boot in Linux Mint

Day after day, project after project, our disk's free space is getting smaller and smaller. There are some solutions available. Installing a new drive is one of them. In this article I'll share how to get a new disk up and running in Linux Mint.
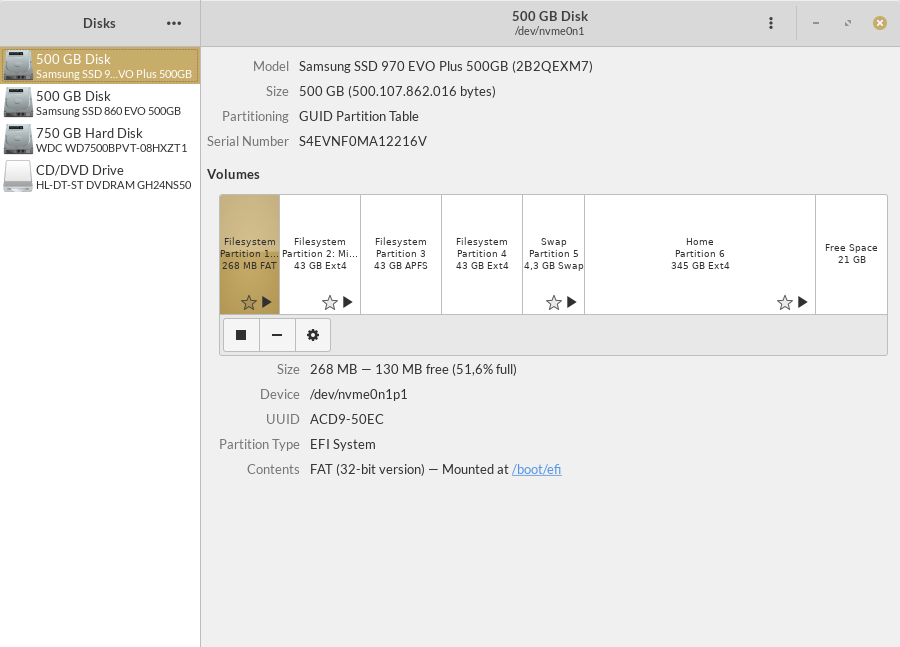
When we installed a new disk on our PC, we must format (and/or partitioning) it first.
When partitioning and formatting is done, it should be appear on your File Manager application. In my case (I'm using Cinnamon), it's called Nemo.
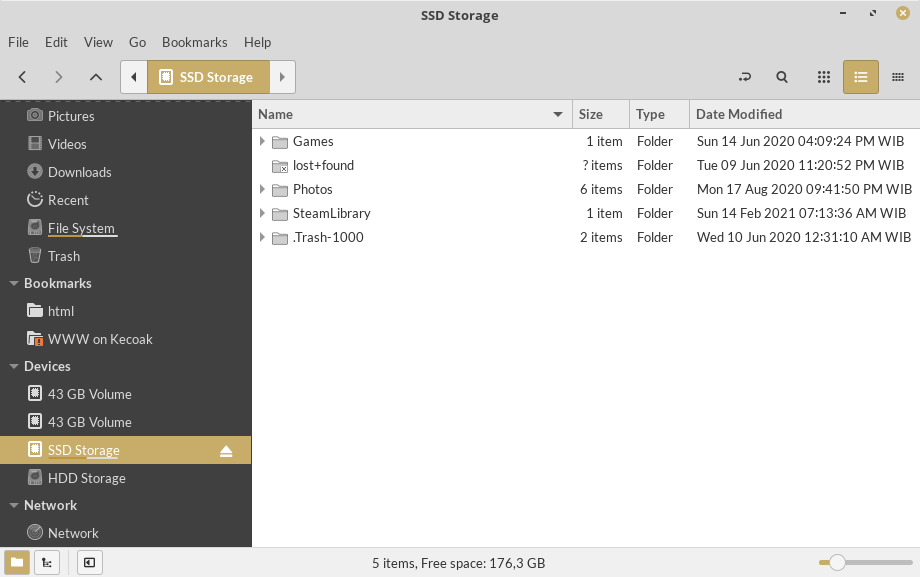
If we want to use the disk, we'll need to mount it first by clicking on the disk/partition name. But how if we want to make the disk being automatically mounted at boot?
Fortunately that's a fairly simple task. In Linux, we have fstab (or file systems table). Commonly located in /etc/fstab, it lists all available disk partitions and other types of file systems and data sources that may not necessarily be disk-based, and indicates how they are to be initialized or otherwise integrated into the larger file system structure.
The fstab file is read by the mount command, which happens automatically at boot time to determine the overall file system structure, and thereafter when a user executes the mount command to modify that structure. We will edit this file to make our new disk automatically mounted at boot.
Identify Disk/Partition
The first thing to be done is to locate the partition you want to mount. In this case, we'll be working with an entire drive. To do this, open a terminal window and issue the command:
$ sudo fdisk -lYou should see a complete listing of all the attached drives to your system. For example:
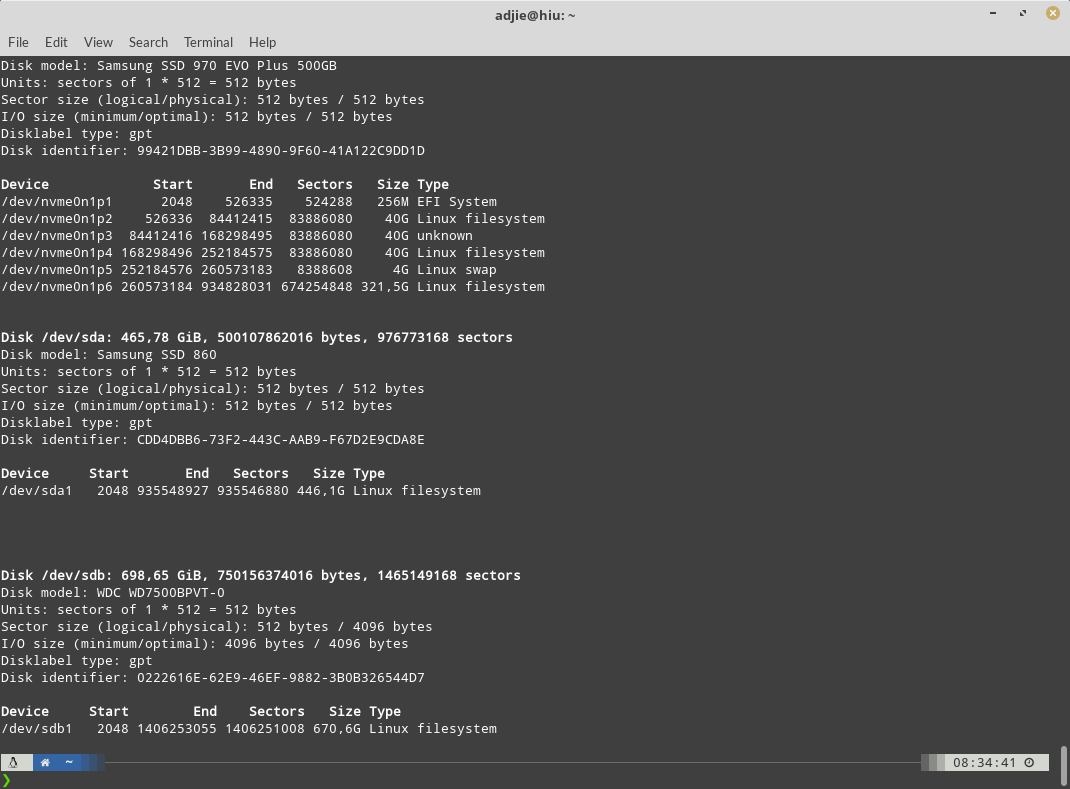
Let's say we figured out the disk we want to mount is on /dev/sdb1. With that bit of information in hand, we're ready to continue on.
Get Device UUID
Next we need to find the UUID (Universal Unique Identifier) of the drive. To do that, issue the command:
$ sudo blkid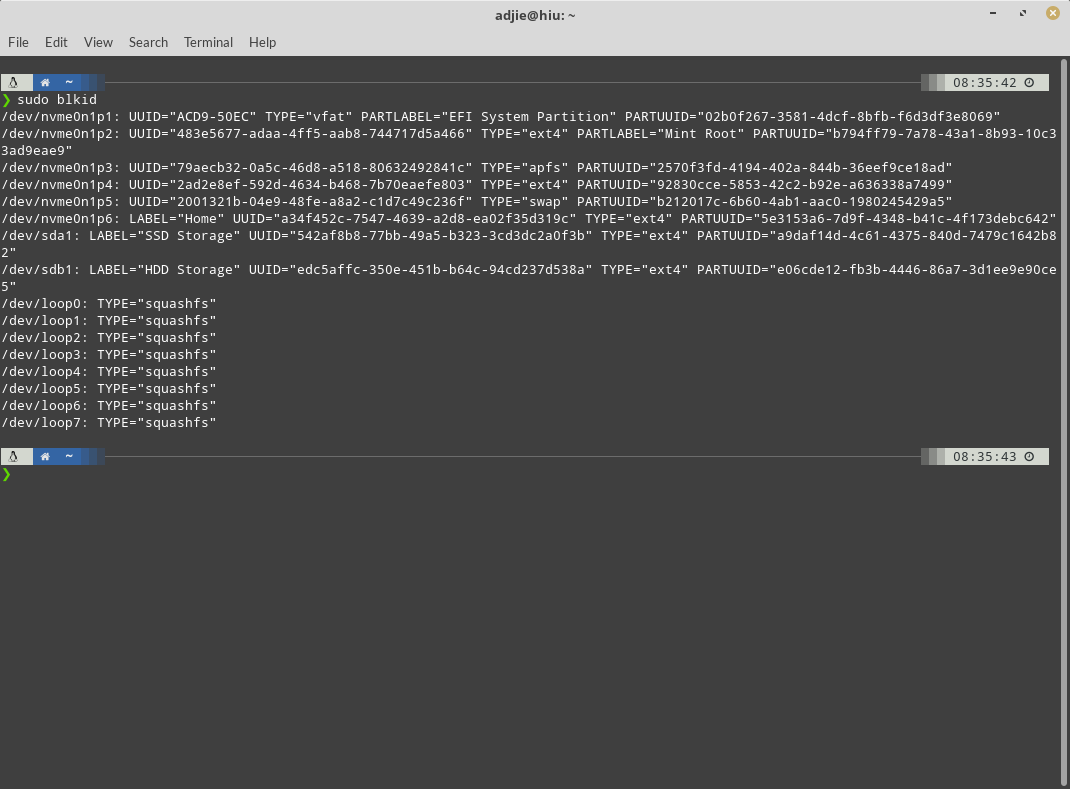
It will display all UUIDs associated with all storage device attached to your machine. Pay attention to your partition UUID which you'd like to be automounted at boot. We'll need it to create a new fstab entry. We are using /dev/sdb1 in this article, so we'll use its UUID which is edc5affc-350e-451b-b64c-94cd237d538a.
Mount Point Creation
Before we add the entry to fstab, we must first create a mount point for the drive. The mount point is the directory where users will access the data on the drive (as they can't access /dev/sdb1 itself). So let's create a directory called data with the command:
$ sudo mkdir /dataYou'll want to also change the group ownership of that directory, so that users can access it. For this, you might create a group called data and then add users to the new group. This could be done with the commands:
$ sudo groupadd data
$ sudo usermod -aG data USER
Adjust USER with the username of the user to be added.
After you've done that, you could then change the ownership of the mount point with the command:
$ sudo chown -R :data /dataNew fstab Entry
In order to create the automount entry, issue the command:
$ sudo vi /etc/fstab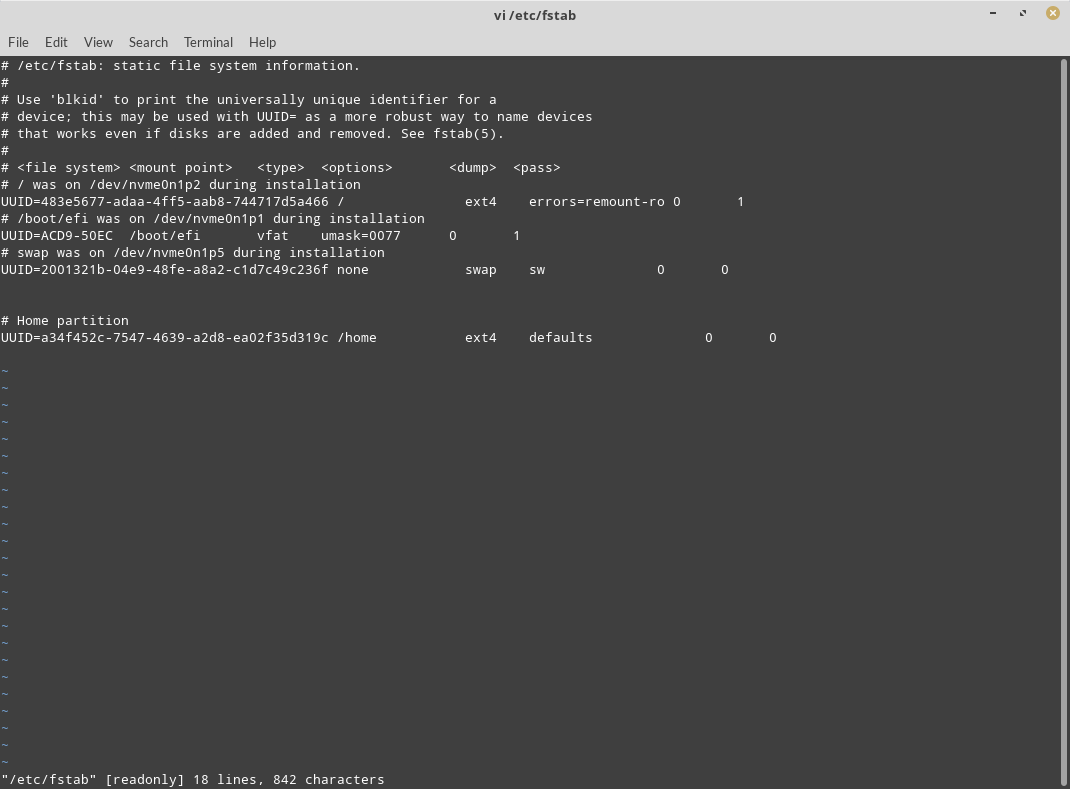
At the bottom of that file, we'll add an entry that contains the information we've discovered. The entry will look like this:
UUID=edc5affc-350e-451b-b64c-94cd237d538a /data auto nosuid,nodev,nofail,x-gvfs-show 0 0The space or tab-separated fields within each row must appear in a specific order:
UUID=edc5affc-350e-451b-b64c-94cd237d538a- the UUID of the partition. You don't have to use the UUID here. You could just use/dev/sdb1, but it's always safer to use the UUID as that will never change (whereas the device name could)./data- the mount point for the device.auto- automatically detect partition type.nosuid- specifies that the filesystem cannot contain set userid files. This prevents root escalation and other security issues.nodev- specifies that the filesystem cannot contain special devices (to prevent access to random device hardware).nofail- removes the error checking.x-gvfs-show- show the mount option in the file manager. If this is on a GUI-less server, this option won't be necessary.0- determines which filesystems need to be dumped (0 is the default).0- determine the order in which filesystem checks are done at boot time (0 is the default).
Save and close the file.
Test and Verify
Before you reboot the machine, you need to test your new fstab entry. To do this, issue the command:
$ sudo mount -aIf you see no errors, the fstab entry is correct and you're safe to reboot.
Congratulations, you've just created a proper fstab entry for your connected drive. Your drive will automatically mount every time the machine boots.
Final Words
I hope that you now know how to automount a partition at boot Linux. If you run into any issues or have any feedback feel free to drop a comment below.
Hi ROOT4BL3.
I was hoping that you could help me with a semi-related problem...
We use LMDE 5 on company computers.
We access our NAS (OMV) on the premises or from anywhere with internet through Zerotier...
The frustration is that for access after system restart, the initial 'mounting' of the folder has to be done by going to Nemo file explorer and clicking on the bookmark for the network file to pop up on the Desktop.
This has to be done before it is visible.
My idea is to use a bash script running on startup to achieve this but I cant find any guide online to achieve this or where to begin searching for the correct file in linux to change this to be done by default on startup...
Would you be so kind as to offer me some assistance by any chance?
Kind regards
B Botha
Hello Brotha,
As a matter of fact, fstab can mount network drives too. You can refer to this article to achieve it: https://help.ubuntu.com/community/Fstab#Device
I hope this is what you need.
Since I have done that Audaticous has no access to the drive anymore via open file/folder.
What could be the problem?
my fstab entry:
UUID=33303DC6 /Div2 auto,nosuid,rw,nodev,windows_names,nofail 0 0
thanks!
It could be permission issue. Verify that your user account able to access /Div2 directory.
Very helpful, thank your for the article